
This post is also available in:

One of the most-feared bugaboos for those who take up long-exposure digital imaging is getting nice round stars, as a result of good-quality autoguiding. To this end, there are several options available on the market: however, they are mostly dedicated devices (e.g. self-guiding cameras from Sbig, or Starlight Xpress’ SXV Guider ), or very powerful but pricey products (as is the case with the STV from Sbig), or even newcomers which still have to conquer their customer base (e.g. the Starlight Xpress Lodestar or G1 cameras from Moravian Instruments. Up until a few years ago, the ubiquitous Sbig ST4 was the most popular out there, but since it was discontinued a few units can pop up in the used market every now and then (since its proud owners won’t give them away easily). Its successor, the STV, is known to be an eccellent performer, but its high price tag places it well beyond the average amateur’s budget.
Basically, the market is lacking a product that meets all the following requirements:
- lightweight
- easy to use, both at the physical (e.g. by minimizing the power requirements and the wire tangle) and application (software used and learning curve) level
- low price tag (after all, they are meant to be used for autoguiding only).
Actually, one could resort to thermoelectrically cooled CCDs, such as the Atik 16IC or the entry-level Starlight Xpress models, which are more than adequate for this purpose: however, Peltier cooling makes them rather power-hungry and calls for a bunch of extra cables, thereby increasing the complexity of the infamous wire tangle. Indeed, they work well but fail to meet at least one (or more) of the above requisites.
However, the situation has recently changed. Cheap PRC-made products are making their way in this market niche too, making it possible to come by some very interesting products. One of such cameras, the Magzero MZ-5m, is imported in Italy by “Ottica San Marco”, and has gained a strong popularity since the very first day it came out. According to the specs, it can also be used for hi-res lunar and planetary imaging (as stated in an article recently published on the Italian Coelum magazine). However, for this purpose there are already quite a few better products out there: therefore, in this article we’ll delve into the application we’re mostly interested in, and see how the MZ-5m fares as an autoguiding camera.
The Magzero MZ-5m comes in a very minimal, yet complete, package: camera head, driver and software CD, USB cable and ST4-compatible (6-pin) RJ cable. Currently, support is provided for the following programs: Maxim DL, PHD Guiding, Guidemaster, Astroart.
Camera’s first (star) light
All tests were done with a SkyWatcher 70/500 guidescope, riding alongside an ED80 refractor on a Losmandy G11 mount with a MicroGiga DA1 clock drive; our imaging camera was an Atik 16HR. It’s worth noting that the mount used had a couple significant flaws: loose RA clutch and fairly big PE (like 30 arcsecs ptp). These two factors make the autoguider’s job a tougher one: therefore ours can be considered a rather demanding test platform. We then chose to go with PHD guiding, to see if it actually lived up to its “user-friendliness claims”.
The camera can be installed in no time: just follow the enclosed instructions, and you’re ready to go. We assume the whole imaging rig has already been correctly set up (i.e. polar aligment, balancing, CCD/DSLR focusing, etc.). After hooking up all wires (actually, only two: the USB cable from the PC to the camera, and the RJ cable from the camera to the motor drive’s autoguider port), we proceed as follows:
- Start PHD Guiding in preview mode
- Focus the camera
- Align the X and Y axes to RA and declination respectively (though not mandatory, this is strongly recommended)
- Choose a guide star
- Launch the calibration procedure
- Start autoguiding.
Mount calibration is performed automatically by PHD guiding: it consists in slewing the mount in the four directions (N, S, E, W) at guiding speed, so as to measure the drive’s responsiveness to guiding corrections and figure out all parameters needed. The calibration routine only takes a few minutes, and that’s it: it has to be done at least once at the beginning of the imaging session, and subsequently only if aiming at significantly different portions of the sky.
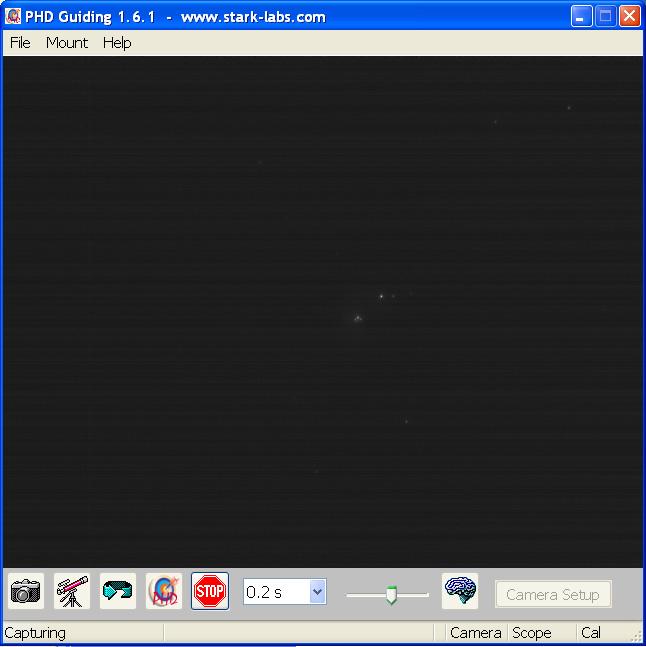
The following screen capture depicts the PHD Guiding window with the telescope centered on Orion’s Trapezium, just seconds before calibrating the mount:
Once the calibration is over on the chosen star, PHD “marks” it with a crosshair and starts guiding:
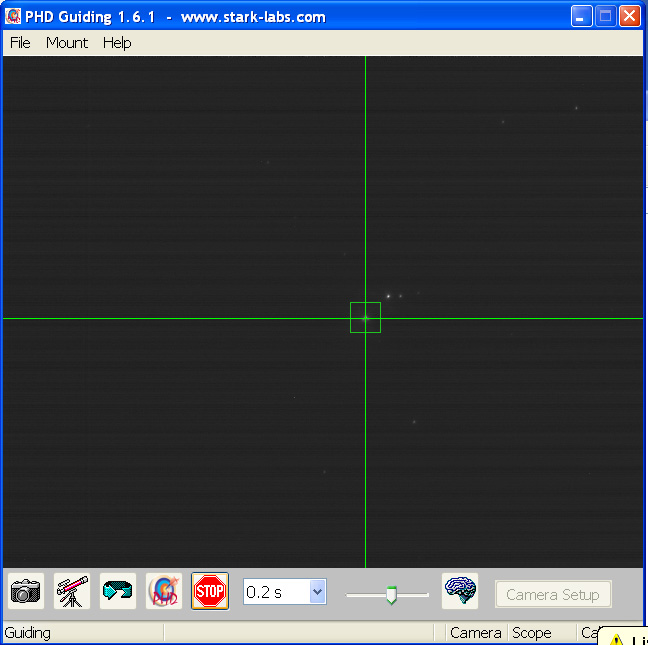
Please note the horizontal banding on the real-time preview: however, this doesn’t seem to be affecting the guiding performance.
Practical outcome (1): exposures and autoguiding trials
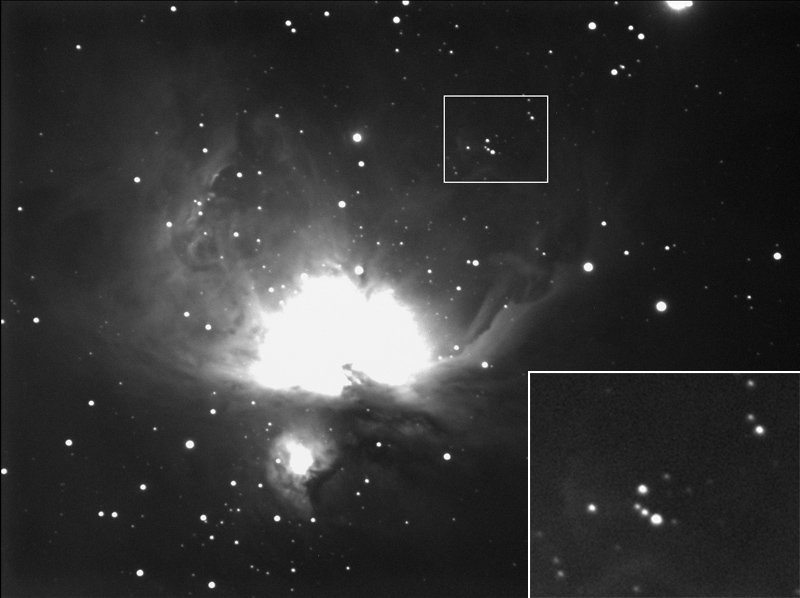
All images were acquired on Nov 30th, 2007, at a suburban location near Varese, Italy, which is not certainly renowned for its clear and dark skies; yet, it’s perfeclty suitable for this kind of tests. For our task we chose two very easy targets: M45 (The Pleiades) and M42 (Orion Nebula). The former is of course way bigger than the 16HR’s field of view, while the latter barely fits into it. We took different exposures of the two targets, ranging from 30 seconds to 10 minutes (which is the typical duration of a single CCD exposure, whereas for DLSR imaging it can be longer). It must be noted that M42’s shots were somewhat spoiled due to a bad choice of the guidestar: the Trapezium is actually a multiple star, which the MZ-5m can resolve into all of its components with a 500 mm-FL scope. Of course this is a less than ideal condition, as the guiding software can easily be fooled by its target not being made up of a single, coherent object. Here are the most important settings:
- Exposure time: 200 msec (0.2 s)
- Slack takeup and aggressiveness: PHD’s default
- Guiding speed: +/-0.6 x (relative to sidereal rate), 0.5x in declination
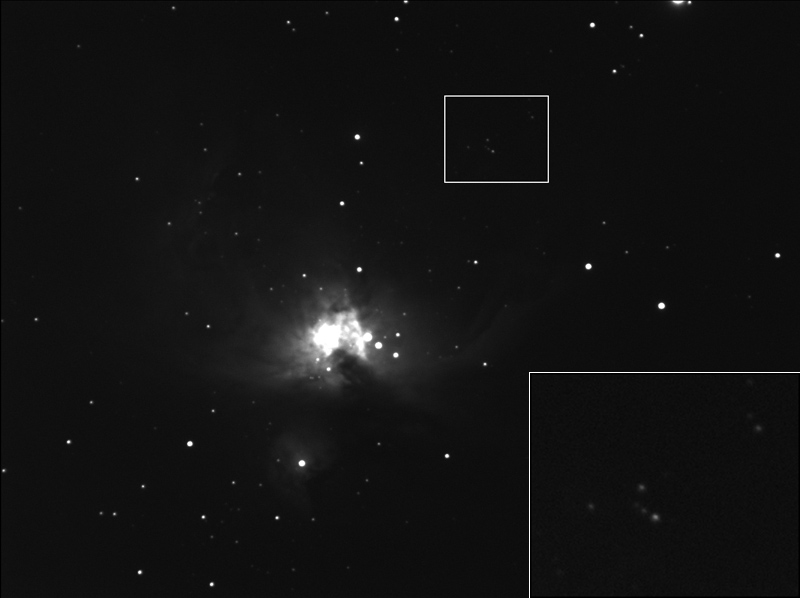
Below you can check out the original images (scaled down to 800 x 600 pixels) with a 3X zoomed inset showing a sample of the star field for judging the guiding quality. They didn’t undergo any particular processing, except for a slight level stretching. The exposures of M45 were spoiled by a light leak in the filter slider, most likely due to my laptop screen being too bright and too close
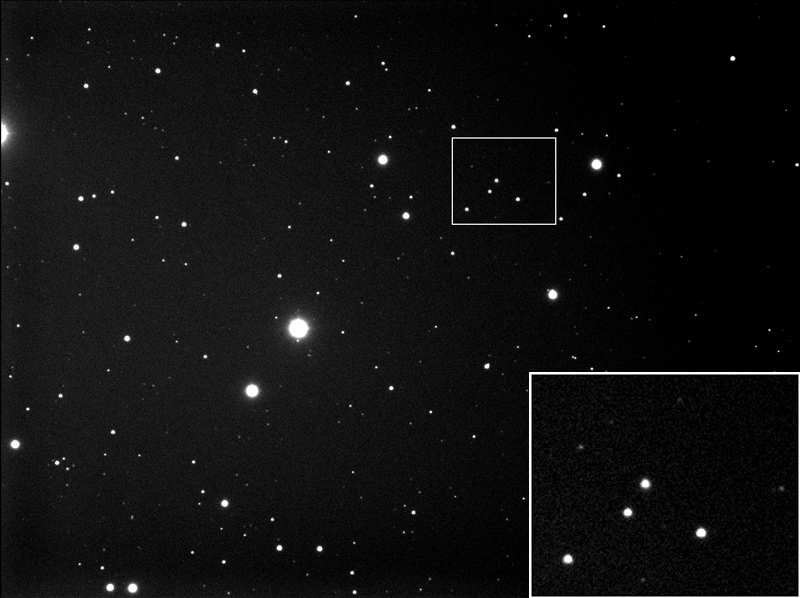
M45, 30 s exposure

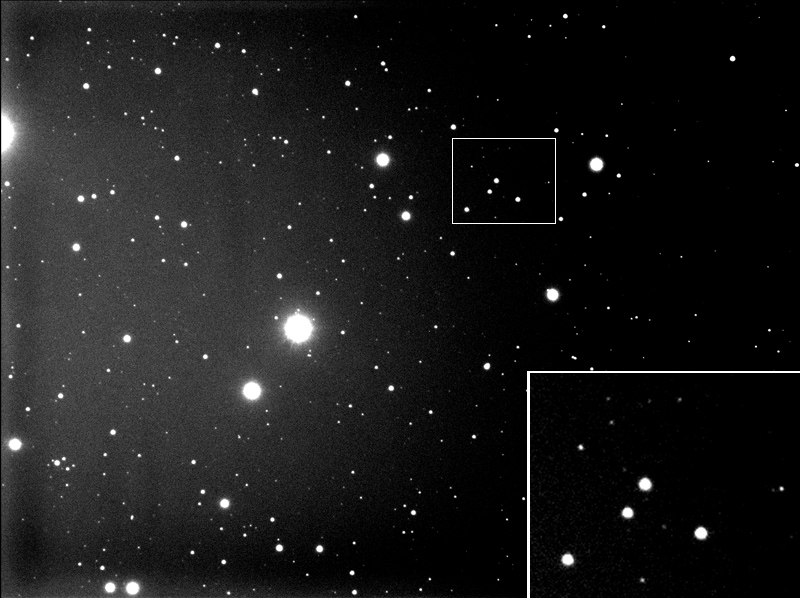
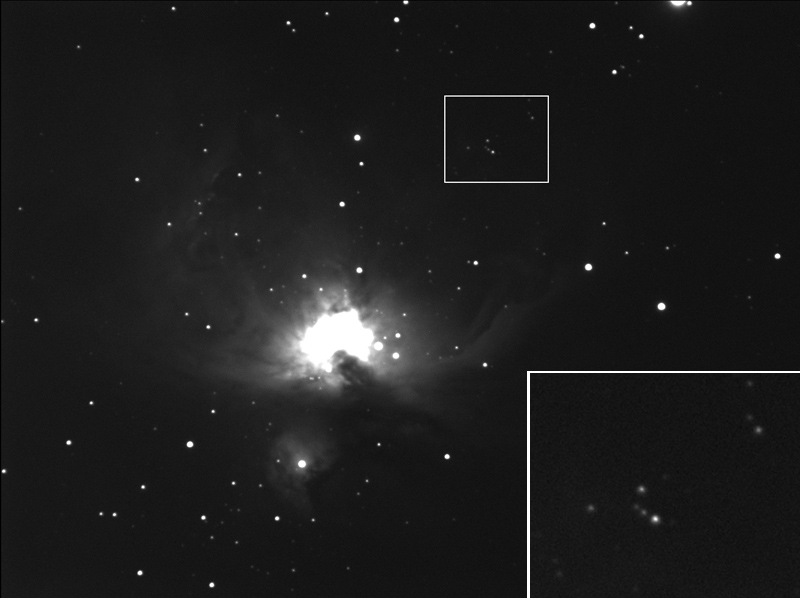
And now, here comes M42. The shots are in ascending order of exposure duration. We start off with a 30s exposure:
M42, 1 min:

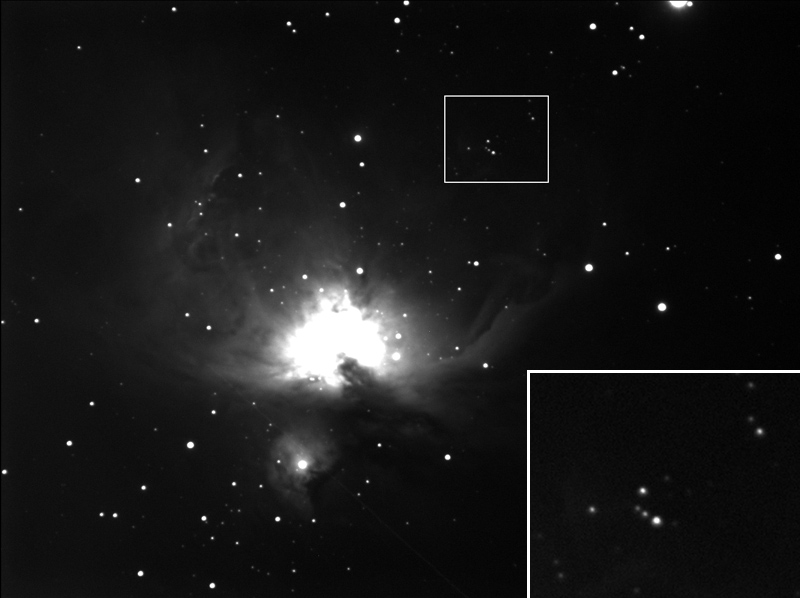
M42, 10 min:
Practical outcome (2): guidestar limiting magnitude
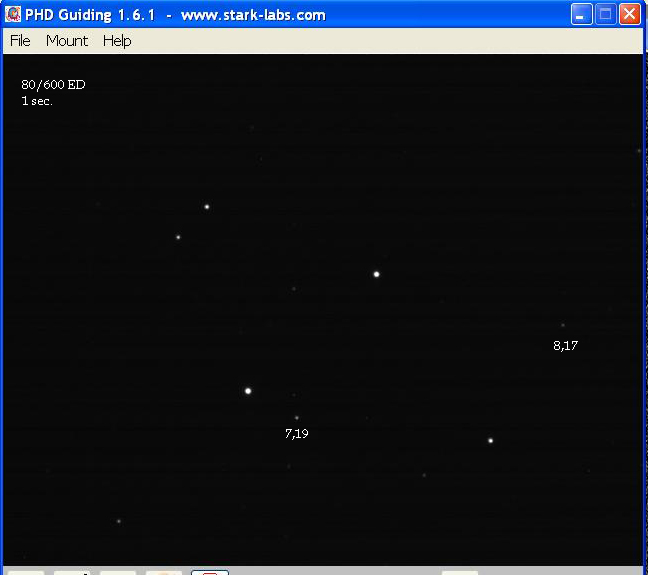
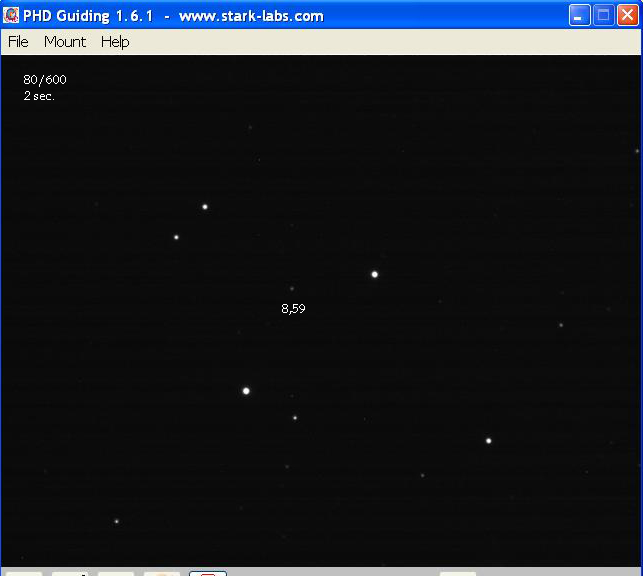
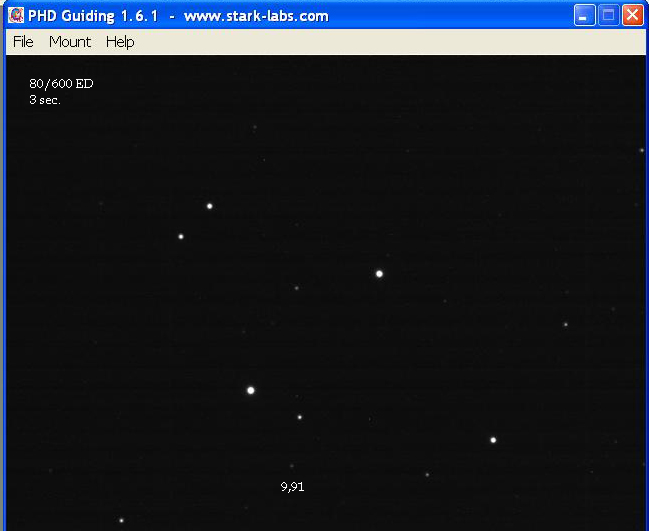
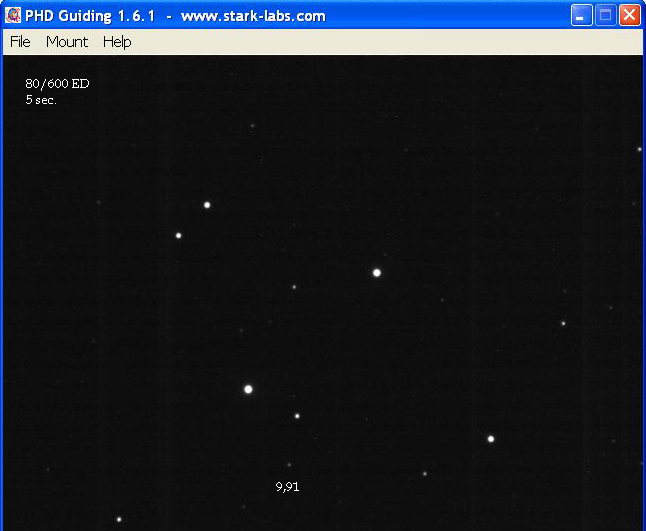
Following our first trials, Fabio Padulosi did some additional autoguiding tests with the MZ-5m on December 28, 2007. These tests, which turned out to be very interesting, were performed with a different setup (main scope: Intes MK69 astrograph, with a SW ED80 refractor as a guidescope, both riding on a Skywatcher EQ6 SkyScan mount). In this run he shot 600-second exposures of the Pleiades. The shots were taken with increasingly long exposure times on the autoguiding camera: for each exposure, he captured PHD Guiding’s screen where he also marked the magnitude of the star he was able to successfully autoguide on. Below you can find the pictures.
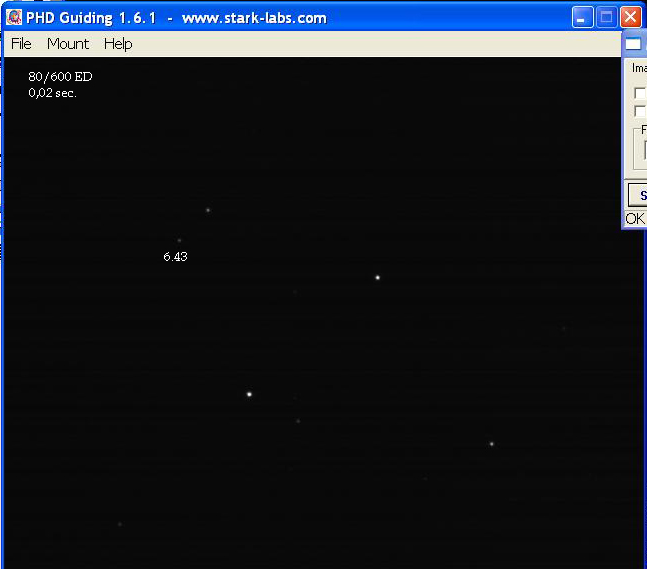
0.2 sec-exposure (please note: the exposure info on the picture is incorrect!)
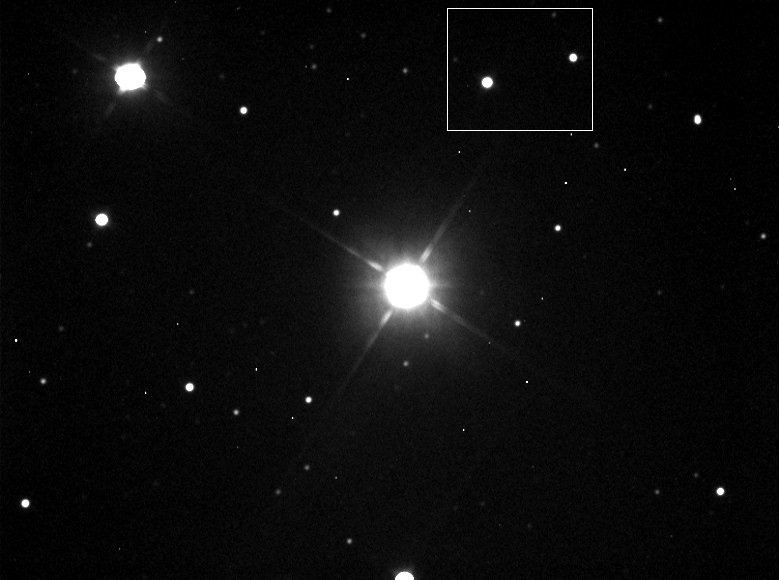
A 300-sec image taken at the prime focus of the MK69 (150/900) with a Starlight Xpress MX716 CCD:
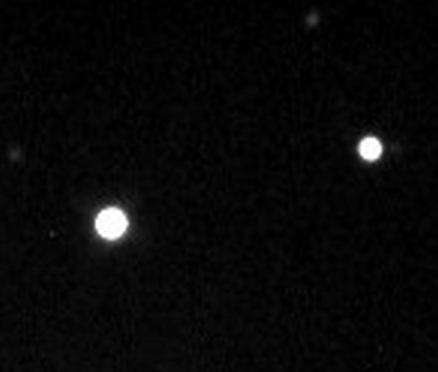
Here is a 3X-zoomed detail from the above image to better check out the shape of the stars:
Now we can arrange the autoguiding exposure times vs. the guidestar magnitude in the following table:
| T exp (s) | Guidestar mag |
| 0.2 | 6.43 |
| 1.0 | 7.19, 8.17 |
| 2.0 | 8.59 |
| 3.0 | 9.91 |
| 5.0 | 9.91 (and most likely, > 10) |
which clearly shows that a 80-mm scope can do well with 1-2 sec exposures on 8th magnitude stars. The autoguider exposure time also determines the correction responsiveness: Fabio’s rig did work well with all settings and in general your mileage may vary, but I would personally leave the longest times (i.e. 3 and 5 secs) only for the best and most precise mounts out there.
To dig deeper into the topic, we can also try fitting the points from the table with a least squares line. We then plot a graph with guidestar magnitude on the Y-axis, and Log10 of the exposure time on the X-axis since the magnitudes are intrinsically of the exponential kind. Here’s the outcome:
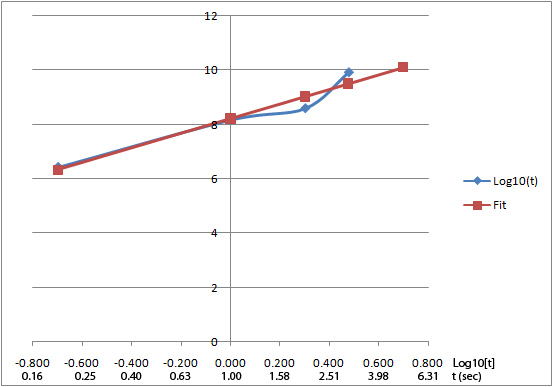
where “Fit” indicates the fitting line which is given by the following equation:
GSLM = 2.69 Log10(t) + 8.22
where t is the exposure time set on the guiding camera and “GSLM” the GuideStar Limiting Magnitude. When performing the calculation, I purposely left out the brighter star available for the 1-sec exposure value, since it was probably a tad too strict. Anyway, the linear approximation is on the whole fairly good, and very good for the leftmost part of the curve.
As a final thought for our magnitude digression, the table below depicts the correction factors (magnitude: algebraic sum; number of stars: multiplicative) to figure out the faintest magnitude star we can expect to autoguide on with different guidescopes. In this case, an 80-mm scope is taken as reference.
|
Guidescope aperture (mm) |
60 | 70 | 80 | 90 | 100 | 110 | 120 | 130 |
| Correction factor (mags) | 0.62 | -0.30 | 0.00 | +0.26 | +0.48 | +0.69 | +0.88 | +1.05 |
| Relative number of stars (mult. coeff.) | 0.52 | 0.73 | 1.00 | 1.32 | 1.67 | 2.08 | 2.55 | 3.06 |
The raw numbers from the above table may not be telling anything special at first sight; however, let’s just take a 100-mm guidescope as an example. We then see that the useful guidestars can be about half a magnitude fainter (+0.48), which yields a greater chance of running into a good one by 67% (1.67x)!
Comments and comparisons
Taking all factors into consideration, I’d say this autoguiding setup performs fairly well. With a better-tuned mount, we could probably have increased the exposure times up to 15-20 minutes, which would have been a very tough test we may look into doing in the time to come. Anyway this small camera showed off its potential, also thanks to the its generous sensor size, which greatly eases the task of finding a suitable guide star.
Anyway, it’s not gold all that glitters. The two main weaknesses of the MZ-5m are its sensor’s noisiness and its low sensitivity and dynamic rance (8 bits only). Just to make a comparison, all other factors being equal the Mintron MTV-12V1C-EX is about a magnitude more sensitive than the MZ-5m. Since the longest single exposure delivered by the Mintron is 1/50s, we used its stacking feature by summing 12 exposures together (which yields a 0.24-second exposure). On the other hand, the Mintron’s got its handful of drawbacks: smaller sensor, no built-in guiding interface, need for an additional power supply and the use of a frame grabber, since it only outputs an analog signal.
Conclusion
The time has come to draw a conclusion. By no means is this review exhaustive, but only one instance of possible use: in fact, we know that a host of different factors can affect the quality of long exposure autoguiding. Anyway, we can try to summarize the MZ-5m’s strengths and weaknesses in the following table:
| PROS | CONS |
|
|
So, bottom line is: regardless of price, there’s much more out there than this camera; but if you are willing not to go broke, as amateur astronomers often do , well this camera is a viable option and above all, a real bang for your buck.
Acknowledgement: this review wouldn’t have been possible without the great help from Fabio Padulosi.